• If you currently own, previously owned or want to own an Avalanche, we welcome you to become a member today. Membership is FREE, register now!

Seat Covers or Re-upholster

03Z71Yellow

Full Member
Joined
Apr 21, 2010
Messages
25
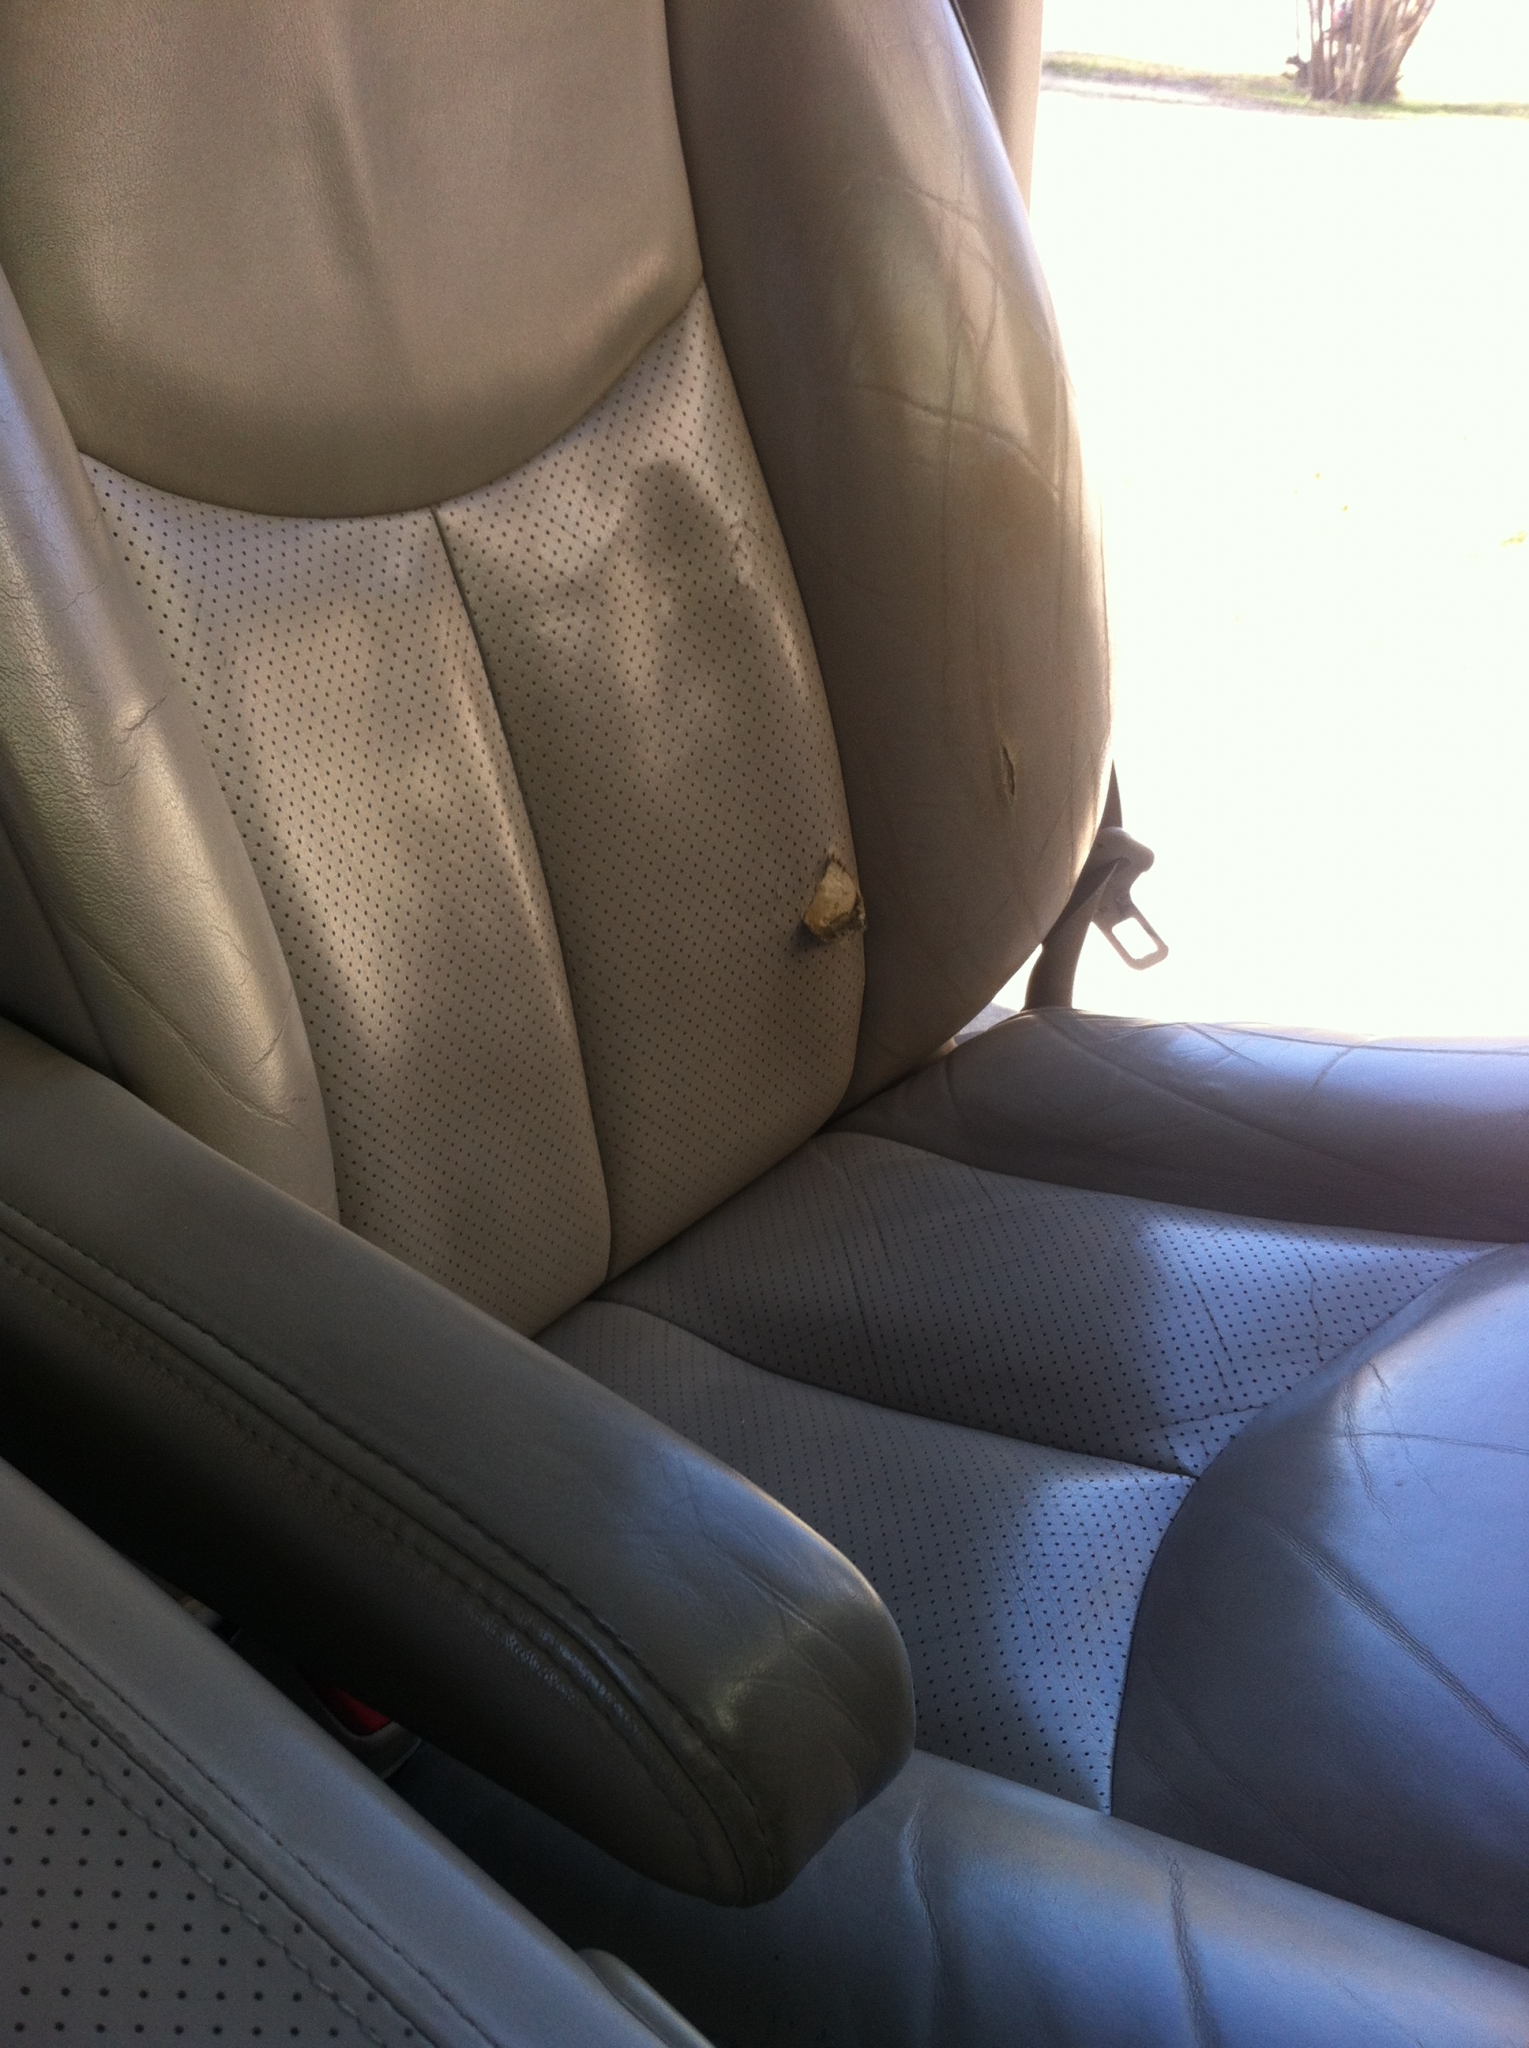
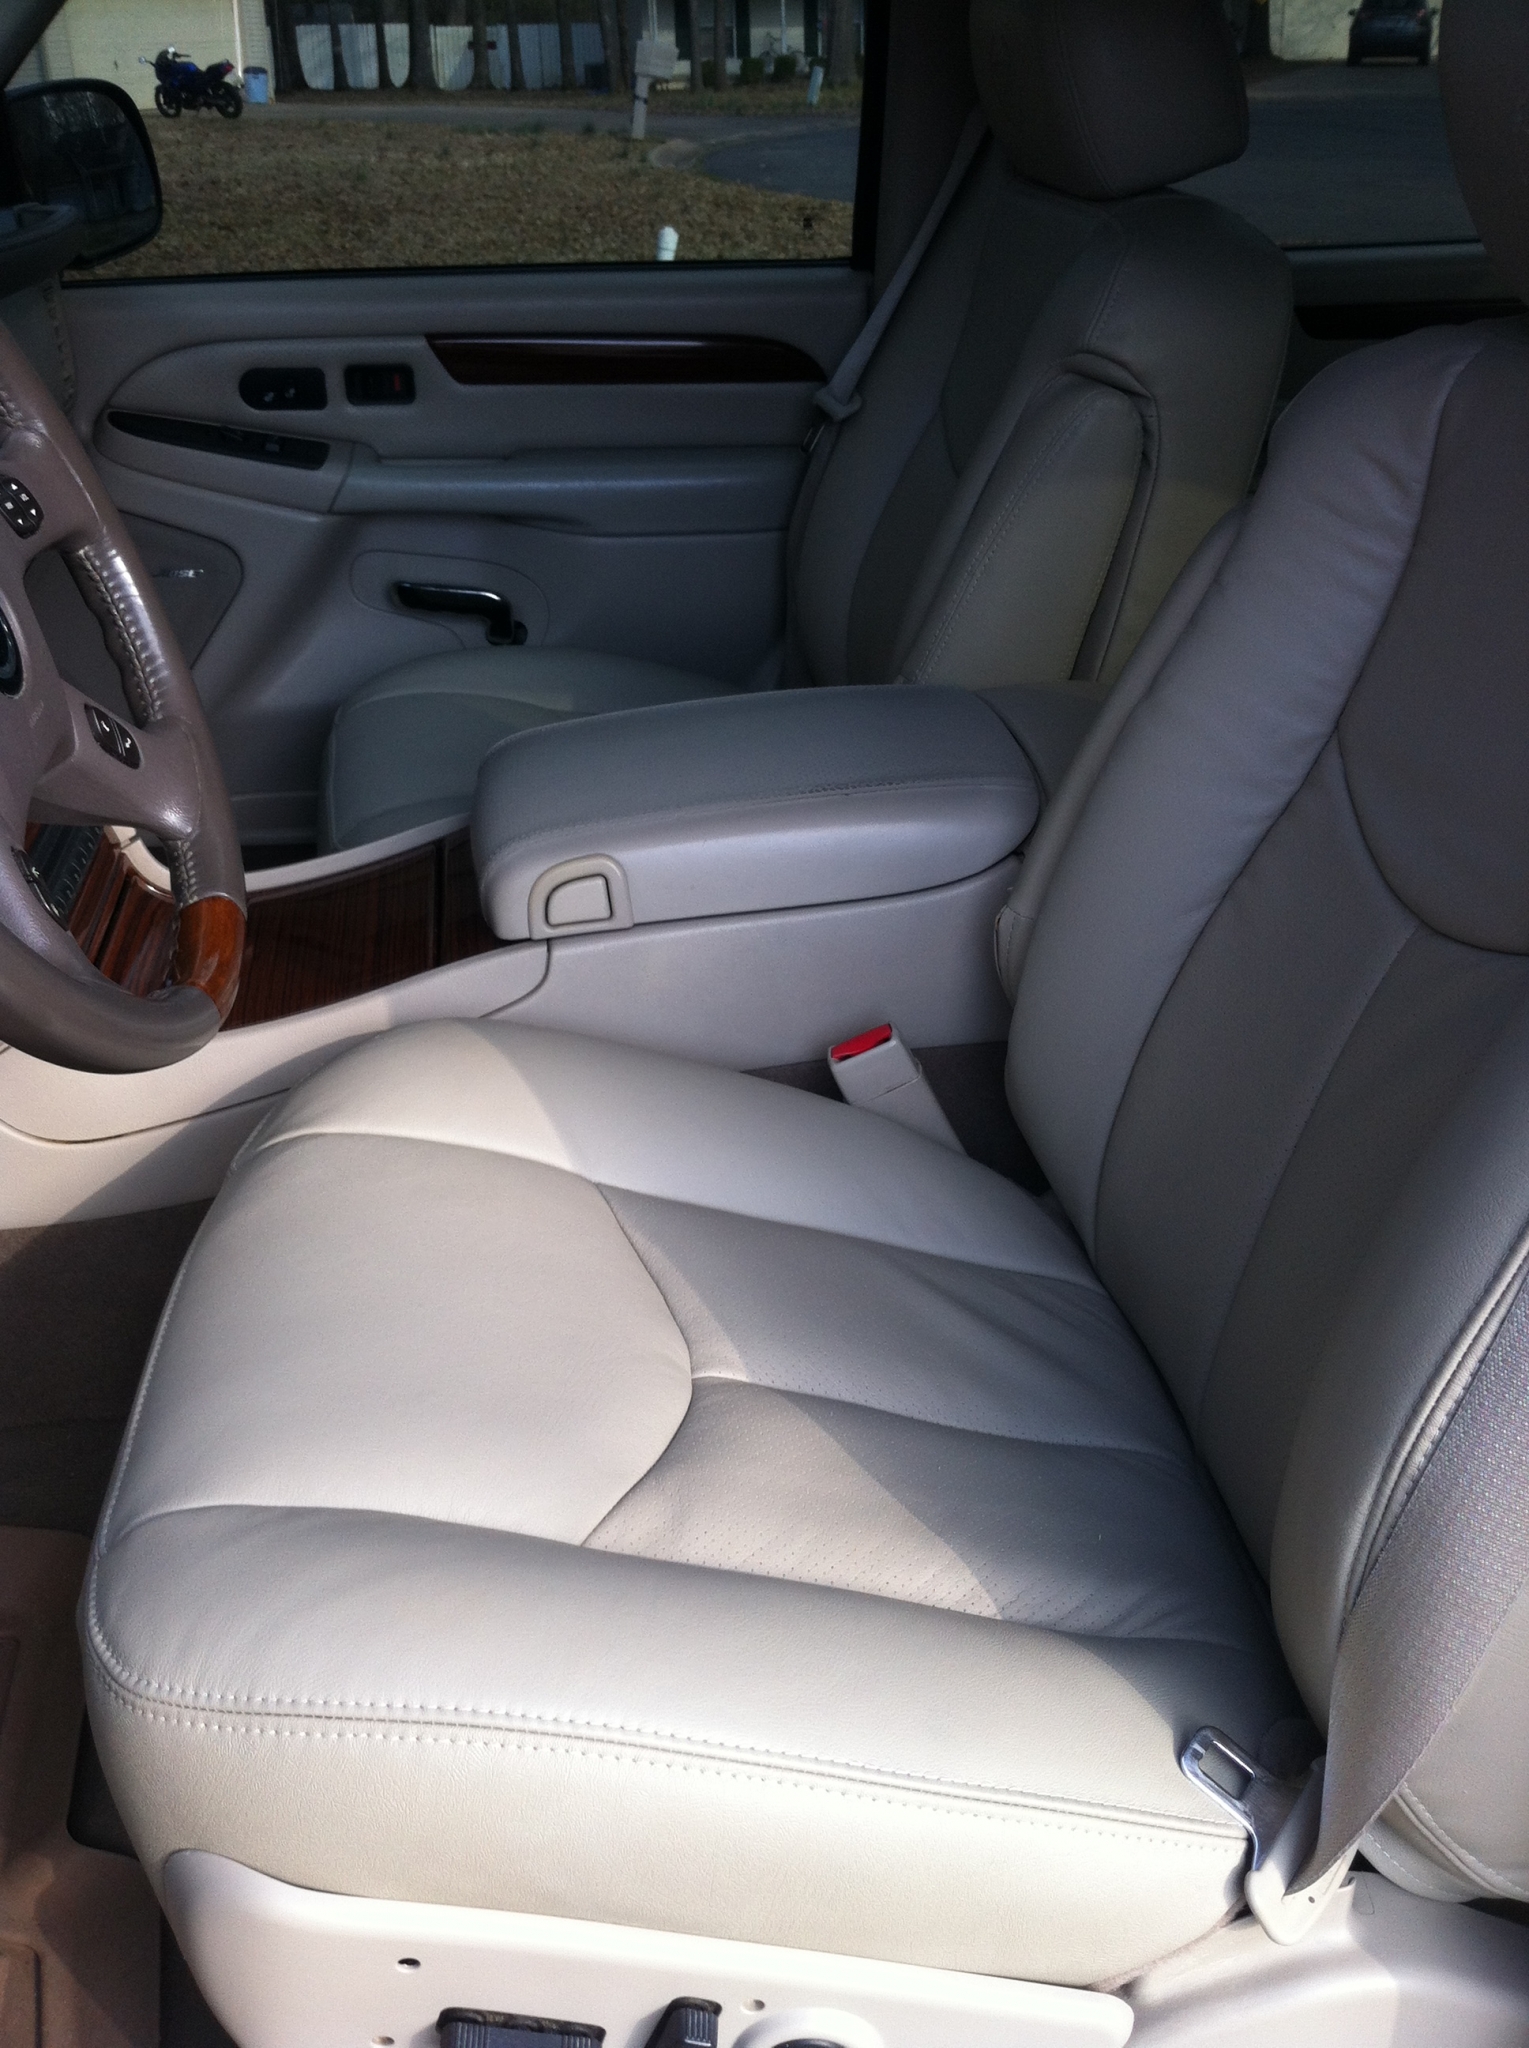
I know there are threads about this already, but they are relatively old and I figured there is both new products, as well as a lot more members having done something to their worn out seats.

I'm looking for opinion on having seats re-upholstered or buying seat covers.  I'm not looking for a "cheap" solution, in fact, I don't mind spending money having them upholstered.  However, if there are covers I can buy and install that will look close to upholstered and save some money, I'm in favor as well.

Any suggestions for the BEST seat covers, or is re-upholstery my only option?  When it comes to seat covers, the stipulation is I don't want it to be noticeable they are in fact seat covers.

 
My thoughts are it depends on what is wrong with your current seats, is the material just old and tired looking or have tears and rips etc. Or is the foam deteriorated underneath? My guess would be if you are talking about your 2003 AV then the driver's seat could be worn out since it's 15 years old. The other seats would vary depending on ratio of solo driving v. loaded with passengers, size of persons in AV and how well they treated the seats of course.
I would think just putting on a seat cover over existing 15 year old foam may not solve all your possible comfort issues, it's hard to know how badly a seat has deteriorated until you do a complete replacement of foam and upholstery since it deteriorated over such a long time it probably wasn't noticed.
 
You're correct, the driver side is worn a great deal more than any other seat.  It has a tear in the left side, where all drivers seats get tears.  All the other seats are in OK condition, meaning no tears, but are old and dirty.  If I had to guess the driver side is only one where cushion may be damaged, however, I'm not feeling any discomfort in the seat itself (could just be I no longer no what a "new" seat feels like.
 
I went with cover king tactical with the Mollie on the back of the seats on my 05 about $600
 
I would look at as if you plan to keep your AV for a short time just get good quality covers, if on the other hand you plan to keep the AV for a long time, do yourself a favor and do it right at least on the driver's seat and replace foam and upholstery with good quality material like from Katzkin.

https://katzkin.com/
 
I replaced all of my front seat leather, including armrests and the driver's seat bottom seat foam with products from The Seat Shop.

Factory fit and finish.

You can pay less, but you will not find better.

IMG_1086.JPG


IMG_1121.JPG


(y)
EXT4ME said:
I replaced all of my front seat leather, including armrests and the driver's seat bottom seat foam with products from The Seat Shop.

Factory fit and finish.

You can pay less, but you will not find better.

IMG_1086.JPG


IMG_1121.JPG
 
I would like to add to this thread something I did when replacing my seat leather.

The pictures I posted don't show a before, but you can see the after.

My seat belts were nasty.

I had used several different fabric cleaners over the years with poor results.

When I was getting ready to install my new seat leather, I did quite a bit of research on what the pro detailers used to clean the belts.

What I found really worked and my nasty seat belts now look brand new.

On my driver's seat, I cleaned the belt while the seat was out of the truck and sitting out on the driveway.

On the passenger seat, I cleaned the belt while the seat was installed in the truck, which is the way I can see most people doing the cleaning, so that is what I will describe.

I started by opening the truck door and fully extending the seat belt all the way out of the seat.

I then closed the door with the seat belt outside of the truck cab.

I fastened the belt latch to the rear wheel of my truck using a bungee cord so the belt lies flat on the truck body pointed toward the rear wheel.

I then took my power washer on a medium setting and I started on one end of the belt fabric, holding the power washer tip about an inch away from the belt, worked my way fully up and down the material.

Flip the belt over to get the other side.

The power washer caused no harm to the truck's paint since it was no stronger than the wand at a good car wash and I was careful to keep the stream of water pointed onto the belt fabric.

You will not believe the dirt that comes out of the belt material.

Let the belt dry and then open the truck door and let it retract.

Belts all look brand new now!

(y)


Back
Top